Do cats need toys?
Certainly! Those cats that roam freely in the wild find their own adventures and usually only come home to eat and sleep. But if the pet is exclusively domestic, its entertainment becomes the concern of the owners. How can a cat child live without toys?
Kittens are like children: they are easily captivated by new activities. But they quickly get bored with toys, and it’s not so easy to come up with something to keep your furry occupied for a long time. After all, if he gets bored, funny races around the house, swinging on the curtains and other entertainment that we are unlikely to like will begin. Sometimes even adult animals are not averse to frolicking, but they still don’t want to lie on the sofa.
Even adult cats need toys
Finding toys for cats in the store is not a problem, but, firstly, they are not cheap, and secondly, the pet may not like them. There are often reviews: we bought an expensive gaming complex for the cats, but they only sniffed the gifts, but were not at all interested.
You can choose ready-made toys and scratching posts for your pets in our catalog, which presents products from large gardening online stores. Choose toys for cats .
Unbranded Cat teaser GiGwi with mouse RUB 379
OBI
Toy for cats FUN CRABY polyester 5 cm Toy for cats FUN CRABY polyester 5 cm 99 rub.
OBI
GiGwi Teaser for cats GiGwi Bird soft toy with sound chip 4x6x9 cm 479 RUR
OBI
Homecat Scratching post for cats Homecat rectangular 45x25x10 cm brown 469 RUR
OBI
Meanwhile, toys for cats are not at all difficult to make with your own hands.
You don’t need any special skills here - there are ideas that even a child can easily implement. Ads by
Cardboard toys
You've probably noticed: if you leave an empty cardboard box somewhere, a cat will certainly nest in it.
An empty box is a challenge! Let's improve this box a little by turning it into an entertaining maze or puzzle :
An ordinary cardboard box turns into a cat puzzle
Nothing complicated: we cut out holes, hide a ball or treat inside, build obstacles using rolls from paper towels and toilet paper ... The latter, by the way, are not bad toys in themselves, because they are so fun to chase around the room!
To make such a toy, you don’t need any special skills.
Let's raise the level: add plastic containers, egg cartons, yogurt cups and other improvised materials to make the puzzle more fun. The more difficult it is to find (and extract) the treat, the longer the pet will be busy.
Let's complicate the maze using available materials
Yes, most likely, the cat will quickly get bored with the fun. No worries, let's take apart the old toy and make a new one! You can even cut the box into circles of different sizes and assemble mice from them, like this:
Cardboard mice
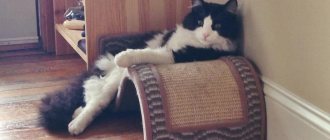
You can also make a scratching post . It will turn out to be short-lived, of course, but it takes little time to make, and the material is completely waste. In the store, by the way, you will have to pay from 200 to 600 rubles for such a product.
Cardboard scratching posts: cats approve
Your cat doesn't like to sit still and doesn't like puzzles? What about playing hide and seek and conquering new heights?
Ghost made of threads
Looking for some fun Halloween decor? Make a ghost out of thread! This decor can be made in 20 minutes, and it will make an indescribable impression on guests and children.
Bend the thick wire into a semicircle. Cut white knitting threads. Tie them on a wire. Cut out the mouth and eyes from paper or glue with black electrical tape.
Do you want to surprise your guests with exclusive decor and quickly and cheaply prepare an area for Christmas or other themed photos no worse than in the studio? Stock up on yarn of different textures and colors and make toys from threads with your own hands. The photos will turn out magical, and you won’t spend a lot of time and money on preparation.
You can make different toys from knitting threads. Using threads of different colors, it is easy to make a bear cub or a chicken, a bunny or a piglet. Making such toys does not take much time. For example, even a child can make a small funny cat.
To make this toy you will need:
– threads for knitting in white and black colors; – thick paper or cardboard; - compasses; - sharp nail scissors; - needle and thread for sewing; - rope or thick decorative cord; – pink bead; - eyes for toys or black beads, - white felt, - pink satin ribbon; - thin black or blue lace.
The procedure for making a cat toy.
1. On thick paper, draw two rings with an outer diameter of 6.5 cm and an inner diameter of 1.5 cm. Using nail scissors, carefully cut out the rings from the paper.
2. Place the rings together and wrap them tightly with white knitting threads until the inner hole of the ring is filled with threads.
3. Using sharp nail scissors, cut the threads along the edge of the rings.
4. Take a piece of white thread, stretch it between the rings, wrap it several times and tie it tightly into a knot.
5. Remove the paper rings and you will have a fluffy pom pom. Trim the pompom with scissors so that it acquires the correct round shape.
6. Now you need to make a black pompom, just a little smaller than the white one. To do this, cut out two rings from thick paper with an outer diameter of 6 cm and an inner diameter of 1.5 cm. Fold the paper rings together and wrap them tightly with black thread. Cut the threads along the edge. Take a piece of black thread, wrap it between the rings and tie it tightly. Remove the paper rings and you will have a small black pompom. Trim it with scissors.
7. Tie the black and white pompoms tightly together.
9. Take two pieces of rope or decorative cord, each 14 cm long. Tie a knot at the ends of the segments. These will make the front and back legs of the cat.
10. Try on the strings to the pompoms and sew them to the pompoms with a few stitches. In this case, you need to ensure that the length of the legs is the same.
11. Cut two small triangles from white felt - these will be the cat’s ears.
12. Try the ears on the head and secure them with a few stitches.
It would seem that thread is not even fabric yet, what can be made from it? It turns out that if you fantasize and conjure a skein of thread, an original toy can be born. There are two basic principles for creating toys from threads. The first, more complex one, consists in the fact that the threads are wound on some kind of base, and the frame takes on neat, recognizable shapes. Then the toy is decorated. The second method is perhaps simpler. This is the creation of string toys from pompoms. That is, how the base is made from pompom threads, and then toys are folded and sewn from several of these fluffy balls. In this article, we have collected for you several interesting and detailed master classes on making toys from threads based on the principle of winding threads onto various frames. So, let's learn a new hobby!
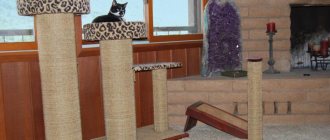
Towers and labyrinths
Using the same cardboard boxes, you can build a real tower , where it’s convenient to hide and train agility.
Only the material for such a construction needs to be chosen more durable and the “floors” should be secured well. Personal tower for a cat
In terms of functionality, a boxed tower is in no way inferior to purchased gaming complexes, but will cost several times less.
For cat fun, such a structure is no worse than purchased play complexes.
And if suddenly the cat doesn’t appreciate our efforts or quickly gets tired of playing with the new “simulator”, it will at least not be so offensive.
Types of products
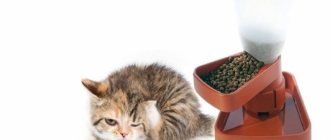
Such a toy may have a hole for placing treats.
A cat ball can be:
- plastic;
- wicker (thread, rattan);
- wooden;
- fur;
- with holes for food;
- rubber.
To entertain the cat, owners buy balls, electronic mice, laser pointers, and pom-poms with feathers. The pet often entertains himself with improvised objects: bags, ribbons, candy wrappers. The variety of toys produced by the manufacturer is growing all the time. The balls have a rattling element inside or feathers on the outside to quickly lure your pet, or they are simply empty products. They are manufactured in various sizes, colors and shapes. “Teasers” help a person to participate in the process of playing with a cat.
Simple toys from scrap materials
Architecture not your thing? No problem! The simplest toys for cats are made from scrap materials in just a couple of minutes - and believe me, they will bring no less joy.
Our kitty, for example, now has a favorite toy - a tightly rolled ball made of plain paper. Production time is less than a minute. Here are some more interesting ideas: It couldn’t be simpler! Tying bright strips of knitwear into knots or winding a thick cord on a reel is a couple of trifles. The toys from the following picture will require a little more time to make, but not much:
Anything that rustles, rattles and rolls is suitable
You can use wine corks, chocolate egg toy containers, nut shells—anything that can roll and/or make sounds. True, we must take into account that every mustachioed-striped has his own opinion: what seems to us an excellent toy, he may consider unsuitable for fun (and vice versa).
Felt mouse
Schemes, patterns and just cool ideas for sewing felt mice
“Incredibly cute little mice”: templates and assembly diagram
Difficulty level for beginners ( See diagrams of simpler and more complex mice below
)
To work you will need
Materials
- Felt in two colors: for the body and tummy. The belly can be made from a material of a different color and texture, most often it turns out even more interesting.
- Threads: for sewing parts and for embroidering the mouse's whiskers and nose.
- Stuffing: holofiber, padding polyester, cotton wool - at your discretion.
- Pattern (you will find it immediately below the list of tools and materials).
Tools
- Scissors.
- Needles.
- Chalk for marking. Pink chalk or pencil for tinting the ears of a felt mouse (see instructions for details).
- A knitting needle or wooden stick for distributing the stuffing.
- Pins.
Mouse pattern on A4 sheet. Just right-click and save the image on your computer or send it directly to print
Please note that some details need to be made in duplicate
Step-by-step instructions on how to sew a felt mouse
1. Transfer the pieces from the pattern onto the felt and cut them out. 2. Mark the points indicated on the sidewalls on the material. These are the places where the ears and tail will be. 3-4. Place the sides together and start stitching - from the nose to the lower abdomen, as in the picture. Make the seam approximately 3 millimeters from the edge.
5. Use wax pencil, crayon or pastel to mark the pink center of each ear (you can skip this step if you wish). 6. Move the sewn halves of the side panels apart. 7-8. Attach the back parts to them. The upper part of this part has a sharp tip. Photo #7 shows how the bottom is fixed. Sew the back from the top - from the tip of the nose, where the sides are already sewn. On this seam, also step back from the edge by about 3 mm.
9. Stop at the pre-marked point. It's time to work on the ears of our adorable felt mouse. 10. Fold the ear in half, pink side inward. 11. Insert the folded ear piece between the back and side pieces. The part should be positioned so that its bottom edge falls on the seam. The ear itself will seem to be inside. 12. Continue stitching the back and side. Now it will be a little more difficult: you need to push the needle through 4 layers of felt (back side + ear folded in half).
13. Sew the side panel completely. Make a knot at the end of the seam at the bottom of the part. 14. Repeat with the other side. Start from the nose. At the marked point, insert the ear, sew it and continue sewing about another 1.5 centimeters. As in the photo. 15. Now sew the side and back together from the bottom. Leave a gap of about 4 cm between this seam and the top one. The stuffing will be pushed through here. 16. Turn the mouse inside out and stuff it tightly. Make sure that the holofiber (or other material you use) fills all the curves of the pattern. First of all - the nose, stomach and head. When you're done with the stuffing, sew the side and back together.
17. Place the felt part of the upper legs on the chest of the mouse. Do not sew or glue yet. 18. Place the tummy detail on top of the paws. Contrasting bellies look interesting. They may differ in color and texture. Examples of such mice will be at the end of this instruction. Start sewing on the belly. Start the seam from the top. When you reach your paws, bend them so that they appear to be folded over your stomach. Sew the paws in this position. The color of the threads for this seam in the example in the photo is matched to the color of the rest of the material. But you can act differently and choose contrasting threads. It looks good too. 19. Use black thread to mark the mouth and nose of the mouse. The eyes can be indicated by knots of the same threads. Or sew on small black beads - whatever you like. 20. Cut a thin, tapered strip of felt. This will be the tail of our mouse. Wrinkle and twirl this strip between your fingers to make the tail less straight and flat. 21. Sew the tail in the place where the bottom point was on the felt mouse diagram. If the mark has already worn off, no problem. Sew the tail at the very bottom of the back, where it meets the sides. 22. Final step. Sew the lower legs of the mouse with a couple of stitches. Place them on either side of the tail sewn on in the previous step.
This fairly simple pattern by needlewoman Anne Wood is popular all over the world. You yourself have probably already convinced yourself. The toys turn out to be cute and at the same time varied. You can experiment with the expression of the faces, the color of the tummies, and even the felt itself. Look what happens in the end.
“Friendly mouse”: pattern and step-by-step description
Difficulty level for beginners
Materials for work
- Felt of a basic color for the body (shades of gray, brown or cream are most often used).
- A piece of pink felt for the tail and ears.
- Light and dark threads.
- Black beads are for the eyes.
- Stuffing (wool, holofiber, cotton wool, padding polyester).
- A coin, pebble or large metal washer - to give the mouse stability.
- Pattern (picture for A4 format is located just below).
Tools
- Needle.
- Scissors.
- Pins.
- Chalk for marking.
2. When the thread reaches point “A” (this is where the mouse’s nose will be), begin sewing on the ABDOMINAL part. Align both points marked on the pattern with the letter “A” and sew one side - from “A” to “B”. Make a knot at point “B”.
3. Sew the other side of the belly. Also from "A" to "B". This time, do not make a knot at the bottom.
4. Take the BOTTOM piece. Place the wide side against the wide, still free part of the abdomen. Continue the seam that led from “A” to “B”: sew the bottom and side parts together (that is, continue the seam from point “B” to point “B”).
5. Stop at point “B”. There will be a tail here. Insert it between the bottom and side pieces and secure with 2-3 stitches.
6. Continue stitching until both sides are sewn to the bottom.
7-8. It's time to give our felt mouse volume and stability. Push the stuffing into the gap between the bottom of the belly and the front edge of the bottom. It is better to use a knitting needle or a wooden Chinese stick so that the stuffing fills all the cavities. Including where the nose is.
9. Our mouse will appear to be standing on its hind legs and we need to think about how to make its lower part heavier. The easiest way is to insert a coin or a large metal washer when the stuffing is finished. They weigh more than felt and holofiber and are flat. You can also use a pebble from a pebble beach. Then make sure that it is surrounded on all sides by padding and does not stick out from under the felt.
10. Sew the belly and bottom. Our little mouse is almost ready. If there is still enough thread on the needle, thread the needle through the stuffing, making sure the needle comes out where the ear will be.
11-12. Sew on the ear. Tack with a couple of stitches, first passing one across, to create a gather at the bottom.
13. Pass the needle through the seal again and out the other side. Sew on the second ear.
14-15. Sew on the mouse's eyes in the same way - black beads. First one (step 14), then the second (step 15).
16. Now repeat the same thing, but do not sew anything. Just make loops of thread in the area of the nose (point “A” on the pattern). These will be the mouse's whiskers. After each loop, secure the thread so that the loop does not unravel.
Finally fixing the thread, tighten the knot at the tip of the nose. Cut the thread. And cut the mustache loops to make the mustache straight.
Your felt mouse is ready. Can be used as a keychain, as an interior decoration, a pincushion or as a toy in a children's dollhouse. As a symbol of 2021 after all
Popular articles DIY cat pillow
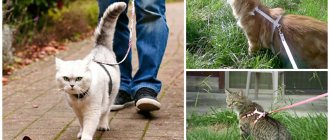
DIY fishing rods
But this is a win-win option - even respectable, experienced, and overweight adult cats are caught with such “fishing rods.”
Not only kittens willingly play with teasers. Making a toy is easy: you will need a suitable stick or twig, a strong cord (or braid, ribbons, etc.) and any small toys that are safe for the animal:
You can make a teaser toy from different materials.
How to quickly and securely fasten the tapes can be clearly seen in the photo below on the left. But you can use other methods of fixation: simply tie the cord to the base, glue it with tape or tape, etc.
The only drawback of such a toy is that it requires our participation in the entertainment. Playing with a cat is a fun and exciting activity, but sometimes there is simply not enough time for it. Well, we’ll have to teach the tailed ones to be independent...
Chicken - a simple diagram with a description for beginners
Use hook No. 2, yarn of yellow, orange, blue, lilac colors.
To crochet toys, you must follow the description and diagrams.
Head (yellow threads):
- 1st row – amigurumi ring of 6 loops;
- 2nd row - 6 inc (12);
- 3rd row - (1 sc, inc) * 6 (18);
- 4 row - (2 sc, inc) * 6 (24);
- 5th row - (3 sc, inc) * 6 (30);
- Row 6 - (4 sc, inc) * 6 (36);
- Row 7 - (5 sc, inc) * 6 (42);
- 8-13 row - 42 sc;
- Row 14 - 7 sbn, (1 sbn, inc)*3, 15 sbn, (1 sbn, inc)*3, 8 sbn (48);
- 15 row - 7 sbn, (2 sbn, inc) * 3, 15 sbn, (2 sbn, inc) * 3, 8 sbn (54);
- 16-18 row - 54 sc;
- Then there will be a decrease, so between the 14th and 15th rows sew on the button eyes;
- Row 19 - (7 sc, dec) * 6 (48);
- 20 row - (6 sc, dec) * 6 (42);
- 21 row - (5 sc, dec) * 6 (36);
- 22 row - (4 sc, dec) * 6 (30);
- 23 row - (3 sc, dec) * 6 (24);
- 24 row - (2 sc, dec) * 6 (18);
- 25 row - (2 sc, dec) * 6 (12);
- Row 26 - 6 dec (6).
Stuff the body with holofiber and tighten the thread.
Beak - orange thread:
- 1st row - 5 sc in amigurumi ring;
- 2nd row - (1 sc, inc)*2, 1 sc (7);
- 3rd row - 7 sc;
- 4 row - (2 sbn, inc) * 2, 1 sbn (9).
Sew the beak between 16 and 20 rows, filling as you sew. Embroider eyebrows and eyelashes with black thread. Next, depending on your imagination, make a forelock and tint your cheeks.
Body – yellow thread:
- Fill with holofiber as you knit.
- 1st row - 6 sc in amigurumi ring;
- 2nd row - 6 inc (12);
- 3rd row - (1 sc, inc) * 6 (18);
- 4 row - (2 sc, inc) * 6 (24);
- 5th row - (3 sc, inc) * 6 (30);
- Row 6 - (4 sc, inc) * 6 (36);
- Row 7 - (5 sc, inc) * 6 (42);
- 8 row - (6 sc, inc) * 6 (48);
- Row 9 - (7 sc, inc) * 6 (54);
- 10 row - (8 sc, inc) * 6 (60);
- 11-18 row - 60 sc:
- Row 19 - (8 sc, dec) * 6 (54)
- 20-21 row - 54 sc;
- 22 row - (7 sc, dec) * 6 (48)
- 23-24 row - 48 sc;
- 25 row - (6 sc, dec) * 6 (42);
- 26 row - (5 sc, dec) * 6 (36);
- 27 row - (4 sc, dec) * 6 (30);
- 28 row - (3 sc, dec) * 6 (24);
- 29 row - (2 sc, dec) * 6 (18);
- 30 row - 18 sc.
Leave the thread and sew the head to the body.
Tail:
- Yellow threads, does not fill
- 1st row - 4 sc in amigurumi ring;
- 2nd row - 4 inc (8);
- 3rd row - 8 sc;
- 4th row - (1 sc, inc) * 4 (12);
- 5 row - 12 sc;
- 6th row - (2 sc, inc) * 4 (16);
Fold and connect sc. Sew to the body at the level of the 8th row.
Wings – yellow thread, do not fill:
- 1st row - 6 sc in amigurumi ring;
- 2nd row - 6 inc (12);
- 3rd row - 12 sc;
- 4 row - (1 sc, inc) * 6 (18);
- 5-16 row - 18 sc.
- Fold and connect sc. Knit two parts. Sew at the level of the 24th row.
Legs – orange thread:
- Feet. Fill as you knit.
- 1st row - 6 sc in k.a.;
- 2-4 row - 6 sc.
- Cut the thread. Knit three parts. It turned out to be fingers.
- To connect, knit 2 sc on the first finger, knit the 3rd stitch of the first finger and the 1st stitch of the second finger together with a single crochet (i.e. we make a decrease), 1 sc, 3rd stitch of the second finger and 1st stitch knit the third finger together, 4 sc, knit the 6th stitch of the third finger and the 4th stitch of the second finger together, 1 sc, knit the 6th stitch of the second finger and the 4th stitch of the third finger together, 2 sc. You will get 14 columns.
- 6th row - (5 sc, dec)*2 (12);
- Row 7 - (2 sc, dec)*3 (9);
- Row 8 - (1 sc, dec)*3 (6).
- Close the hole and hide the thread. Knit two parts.
Next, knit the leg itself:
- 1st row - 6 sc in k.a.;
- Row 2 - (1 sc, inc)*3 (9);
- 3-14 row - 9 sc.
Fold and connect the edges of the sc. We knit two parts. Sew the foot to the leg. Use the edge that was connected to the sc to sew the legs to the body.
Easter egg - blue yarn:
- 1st row - 6 sc in k.a.;
- 2nd row - 6 inc (12);
- 3rd row - (1 sc, inc) * 6 (18);
- 4 row - (2 sc, inc) * 6 (24);
- 5th row - (3 sc, inc) * 6 (30);
- Row 6 - (4 sc, inc) * 6 (36);
- Row 7 - (5 sc, inc) * 6 (42);
- 8-16 row - 42 sc;
- 17th row - (5 sc, dec) * 6 (36);
- 18 row - 36 sc;
- 19 row - (4 sc, dec) * 6 (30);
- 20 row - 30 sc;
- 21 row - (3 sc, dec) * 6 (24);
- 22 row - 24 sc;
- 23 row - (2 sc, dec) * 6 (18);
- 24 row - (2 sc, dec) * 6 (12);
- Row 25 - 6 dec (6).
Popular articles Funny set with butterflies for fashionistas
Close the hole and hide the thread. Cut the tape and glue it to the testicle. Tie a flower. Sew a bead to the flower and glue it to the egg.
Mice for every taste and color
But cats love mice. A mouse toy can be knitted, sewn from pieces of fabric or fur, and even made from cardboard.
Moreover, the artistic value of the product is not particularly important: the pet does not care how beautiful and neat the toy turns out to be. Mouse-toy But quantity is important : the more, the better. It’s so interesting to drive a mouse under a sofa, refrigerator or closet - in a word, to a place where it’s difficult to remove it from! While cleaning our house, we find such “stashes” everywhere, and the mouse that I knitted for the New Year last year has not been seen for several months.
Mice can be anything, the main thing is that there are a lot of them
You can make one mouse, but on a string - it will be the same teaser, and the toy will definitely not get lost. On the other hand, is it worth depriving your pet of the opportunity to proudly march with “prey” in his teeth through the entire house, having first chased it through all the nooks and crannies...
Openwork beauty
If you want to update your interior and surprise your household. Make a new shade for your table lamp. You will need:
- cotton threads;
- PVA glue;
- scissors;
- balloon.
To get started, inflate a balloon of a size suitable for the lampshade. Coat the surface of the ball with glue. Wrap the ball with thread in all directions. Try not to have any gaps. Apply glue again and leave the workpiece to dry.
Carefully make a hole to insert the cartridge. Don’t forget that regular light bulbs get very hot, so use energy-saving ones for this type of lampshade.
This technique can be used not only for lamps, use this technique when making baskets. To make an openwork basket, wrap the ball not completely, but halfway, and also let the product dry.
Popular articles We braid a jar with beads
A vase made of threads will look unusual in the interior. Wrap the vase with threads, let the glue dry and carefully cut in the middle. Take out the vase and glue the blank. And now the new piece of furniture is ready.
The threads left over from embroidery can be turned into beautiful flowers. The principle of making flowers is similar to making a lampshade.
Make a blank for the bud from half a Kinder Surprise box. Wind the threads around the workpiece and let the glue dry. Remove the future flower and use scissors to make petals. If you glue wire onto the petals, the bud will have a more natural look.
Pass the wire through the bud and secure. Wrap the future stem with green thread. Assemble a flower arrangement of flowers of different shapes and colors.
Flowers made of wire and thread
This product will require concentrated and time-consuming work. But your efforts will be rewarded with excellent results.
For work, prepare soft wire, floss and decorations.
The creation of flowers occurs in several stages:
- Let's start by preparing the petals themselves. Wind the wire tightly onto a thin knitting needle, you should get a spiral. Take out the spiral and connect the ends to each other by twisting them tightly. Wrap the threads around the spiral, passing the threads through the turns. Try to wind the threads tightly without gaps. When the petal is ready, pass the thread through the center, thereby forming the vein of the petal. To form a flower you will need 5-7 petals.
- Twist them together and decorate with a bead. You will get a very delicate flower that will delight you and will not wither for a long time.
With imagination and patience, you can make wonderful crafts from leftover threads and yarn. After all, these crafts do not require large material costs, and the materials can be found in every home. Involve your household in creativity and this will be a great opportunity to do something together.
https://sdelaysam-svoimirukami.ru/1615-kotik-igrushka-iz-nitok.htmlhttps://sdelala-sama.ru/podelki/4100-igrushki-iz-nitok-svoimi-rukami.htmlhttps://podelki. guru/podelki-iz-nitok
Soft toys for cats
Yes, cats love soft toys.
I don’t know why, but it’s a fact. They chew them, fight them, hug them and hunt them. Many cats love soft toys. Do not rush to discard this idea, citing the fact that you do not know how to sew toys. No special talents required! Sock caterpillar; “sausage” from a sleeve from an old sweater or children’s tights; a simple pillow toy - even a novice craftswoman can master such crafts.
To make such toys, you don’t need any special talents.
You don’t need a lot of soft toys—one or two will be enough, the main thing is that the cat likes your gift.