COMPOSITION AND FORM OF RELEASE
It is a transparent plastic collar in the shape of a truncated cone. The collar is equipped with four radial stripes for securing a harness or collar. The collar is produced in various sizes depending on the width of the protective field: (7.5 cm), (10.5 cm), (12 cm), (15 cm), (21.5 cm), (25 cm).
PHARMACOLOGICAL PROPERTIES
The use of a protective collar prevents the animal from self-harming (licking, scratching, scratching wounds on the head, neck and body), thereby facilitating and accelerating the healing process of wounds. The cone-shaped shape does not interfere with the animal when feeding, sleeping and walking. The transparency of the collar allows the animal not to lose orientation in space. The collar is practical, hygienic and easy to use.
INDICATIONS
The protective collar is designed to prevent scratching or licking of the body, head and neck when treating wounds, burns and skin diseases in animals. In the postoperative period to prevent scratching of the stitches.
DOSES AND METHOD OF APPLICATION
Before use, you should select the correct size of the protective collar so that the collar does not fall off or, conversely, is not too tight. The protective collar is size 8 for a kitten, size 10 for a medium cat and small dog, size 12 for a large cat and a small dog, size 16 for a medium dog, size 20 for a large dog and size 25 for a large dog. dogs. Once the size of the protective collar has been selected, it is assembled according to the diagram and placed on the animal’s neck.
Collar assembly diagram
Rice. 1. Place the right edge with the cut out rectangles on the paired slits on top.
Rice. 2. Tuck the long strap into the slots that are visible in the rectangular cutouts. Tuck the short straps into the paired slots at the top.
Rice. 3. Collar assembly. A collar for a dog or a harness, bandage, gauze or braid for cats is threaded through the resulting loops.
SIDE EFFECTS
When used correctly, no side effects are observed.
CONTRAINDICATIONS
Not installed.
SPECIAL INSTRUCTIONS
No special precautions are required.
STORAGE CONDITIONS
In a dry place, protected from direct sunlight. Shelf-life Unlimited.
MANUFACTURER
IP Troitskaya E. G., Russia.
The main problem in the treatment of skin diseases in cats is the restlessness of these animals and intolerance to third-party invasions. The area of skin that has been smeared with the medicine will be immediately and thoroughly licked. so-called Elizabethan collar for cats
.
According to legend, the name of the protective cone, placed around the animal's neck and preventing the treated participants from licking the skin, comes from Queen Elizabeth, who introduced high luxurious collars into the fashionable style of high society.
This completes the educational historical excursion; let’s move on to the main question – where can I get an Elizabethan collar? or how to make it?
In large populated areas, you can buy a protective collar at your local pet supply supermarket. The average price of a collar is several hundred rubles.
However, this path is not always possible. Alternatively, you can purchase a medical collar for cats in an online store, but delivery time can be two, three weeks or even several months.
In the case of time is critical, every day is fraught with the development of serious complications.
Therefore, we will use our ingenuity and learn how to make an Elizabethan collar for cats with our own hands from scrap materials. Plastic bottles and cardboard boxes, which are always available in every home and are easy to process, are best suited for this purpose.
When does a high collar become necessary?
- The doctor advises putting a hard and high collar on the pet’s neck after castration, sterilization and other operations . These animals have an innate habit of licking their private parts after using the toilet. If a cat touches a fresh wound with such a muzzle, it may become infected.
- scratch wounds with their claws or teeth , which is also dangerous . You should not allow your pet to lick its fur and skin after it has been treated with chemicals . Such toxic and hazardous substances include various flea sprays, tick ointments, antibacterial drugs, and hormonal creams.
- When lichen is treated with antifungal agents, which are applied to the inflamed areas of the skin. If the product enters the esophagus, it can cause poisoning, and a high collar will prevent such entry.
- The device also saves in the case of applying a bandage to an animal's wound . The cat will try to remove the bandage or gauze bandage, thereby damaging the wound.
When does a dog need a protective collar?
The animal instinctively tries to lick a fresh wound or scratch an itchy spot with its paw. Veterinarians strongly recommend wearing a post-operative collar for dogs to prevent them from accidentally harming themselves.
A protective device will be needed in the following cases:
- The postoperative period requires time for the sutures to heal. Do not allow your pet to lick or scratch the wound to relieve pain and itching. The fastening threads may not hold up and come apart. And penetration of infection into the wound will lead to serious complications.
- Ophthalmic diseases are accompanied by itching and lacrimation. Medicinal ointments are applied to the eyes for a long time. The animal will try to scratch the itchy area with its paws and wash off the medicine. This is especially true for cataract surgery and other complex eye procedures, when it is very important to protect from mechanical damage.
- Ear diseases also cause itching and require the use of a veterinary collar.
- Injured limbs are put in plaster or splinted. The dog usually does not accept the foreign object and tries to remove it. Such actions can lead to disruption of the process of bone fusion and healing of periosteal tissues.
- Skin problems require aseptic conditions and the application of ointments: dermatitis, allergies, bacterial and fungal diseases. Animal intervention can spread the infectious agent to healthy areas of the body or aggravate the disease by scratching itchy areas.
- When treating wool against parasites, toxic drugs are used. Licking the fur after the procedure can lead to poisoning.
- The puppy bitch is protected if she thoroughly licks her nipples, causing milk production. Males are recommended to wear a collar after castration.
Review of Perfect Fit food
Perfect Fit is produced by the well-known company, which produces popular economy class products - Whiskas. Many professionals say that Perfect Fit products, although slightly better than Whiskas, are not up to par with premium food. These reviews apply to both dry and wet food.
has been producing products for cats for several decades, this company operates internationally. Perfect Fit is translated from English as “perfect fit.” In principle, the quality of such products for cats is not at the lowest level, but also very far from ideal.
All Perfect Fit cat food products are packaged in bright packs that attract the attention of buyers. But what is important for the consumer is not the packaging, but the composition and quality of the product.
Not one of the Mars branded foods does not contain natural meat, but in premium foods, although in small quantities, it is present. Perfect Fit contains dehydrated poultry protein, with chicken protein present at 31%. Consumers may think that the food consists of 31% poultry meat, but this is not true.
Here is an example of the composition of Junior Perfect Fit kitten food. Here's what it says on the box: dehydrated poultry protein (including 31% chicken), corn protein, animal fat, corn meal, corn, dried liver, wheat breakdown products, potassium chloride, cellulose, rice (at least 4%), dried cereal protein, salt.
If you read the information about this food on the manufacturer’s official website, it immediately becomes clear that this is an absolutely ideal food for kittens. The company positions its products as optimally balanced feed in its composition. You shouldn't believe this. First of all, study the information about the composition of other foods, for example, Berkley or NOW Fresh.
Perfect Fit manufacturers have carefully developed the composition of their products. They claim that for cats their products are absolutely balanced in terms of the presence of vitamins and minerals that animals need. Again, do not forget that this is just a marketing ploy and in order to get proper nutrition, you should not completely switch your pet to Perfect Fit products.
Like any cat food, this product has its pros and cons.
Benefits of Perfect Fit cat food:
- Low cost.
- Can be purchased in almost any store, both specialized for animals and in a regular supermarket.
- Assortment for kittens and cats, dry and wet food.
Disadvantages of Perfect Fit cat food:
- Almost all proteins are of plant rather than animal origin. Cats are carnivorous animals, and they require animal proteins to grow properly.
- The composition uses a lot of corn to create volume. This is a fairly cheap filler.
- There is no natural meat, only offal.
All Perfect Fit products are represented by 8 types of food.
- Junior - food for kittens and teenagers. Suitable for babies up to 6 months. They need a diet different from that consumed by adults. A growing body needs more minerals and vitamins. Perfect Fit food for kittens and adolescents contains vitamins C, E, as well as essential minerals. This food is produced in the form of small granules, so the animals’ gums and teeth develop better.
- Active - for active pets. This food is suitable for very active adult cats. Such food helps the animal to always be in shape. To maintain the physical activity of cats, the food contains a lot of protein, vitamins A and B, and useful minerals.
- Sensitive is a dietary food. Well suited for animals that suffer from allergies or suffer from indigestion. The product is suitable for maintaining a diet. Contains only natural plant ingredients, no soy or wheat waste. It is very important to give this type of food to cats that suffer from liver and kidney diseases.
We suggest you familiarize yourself with: Leash and collar for ferrets
I n-home - for adult domestic cats. This type of food is suitable for animals that are not active and never walk outside. To prevent your cat from becoming obese due to a sedentary lifestyle, she needs special nutrition. To maintain proper metabolism, this food contains biotin and omega acids.
- Sterile - for castrated and sterilized individuals. Sterilized animals also require special care. The composition includes useful substances that help normalize weight and balance metabolism.
- Senior - nutrition for older cats. Suitable for animals over 8 years old. Older cats require special nutrition that does not contain the vitamins and minerals necessary for activity during adolescence. This food is rich in antioxidants for a beautiful shiny coat, taurine for healthy heart function and glucosamine for strong bones and normal joint function.
- Hair{amp}amp;beauty - for the beauty of the fur of cats. Designed for the care of long-haired cats. Perfect Fit H air{amp}amp;beauty products contain beneficial vitamins and minerals that give the coat a beautiful, healthy shine.
- I n-form - to maintain normal weight. Used in feeding animals that lead a sedentary lifestyle and are prone to obesity. This can happen after suffering some kind of illness, as a result of which the metabolism is disrupted. The product contains L-carotene, which promotes the rapid breakdown of fats.
Requirements for the shape and quality of the collar
If you need to put a high collar on your cat to protect its health, it is important to choose the right design for the size of the animal. The collar must be safe and reliable. The pet should not be able to independently remove this structure or break it with its paws. It is also important that the cat collar does not interfere with free breathing or rub the skin of the neck . Before releasing a cat with this design, you need to carefully check the edges of the product so that they do not cut you.
You can select and buy a plastic collar for rehabilitation after surgery at a pet store, but the designs do not always meet the required parameters. Therefore, often the best solution is to make a product for your cat yourself. For this, a ready-made pattern is used, which is not difficult to find on the Internet.
INTERESTING! The veterinary collar is made not only from plastic, but also from paper. For cats of gentle and calm breeds, you can use dense fabric that is folded in several layers.
Reviews
I encountered the need to use a protective collar six times—that’s exactly how many cats came into my house. Not a single animal escaped sterilization or castration; abdominal surgery also had to be performed. Veterinarians recommended the use of barrier therapy. We bought plastic collars at a veterinary pharmacy.
They drove each of our pets into a frenzy. The cats tirelessly attempted to get rid of the foreign object and refused to drink or eat. We gave up and put on a blanket that did not cause any negative reaction in our furbabies. Of course, she did not prevent the animals from licking their wounds, so she had to carefully monitor them, constantly being at home.
The protective collar is an important element of barrier therapy. But it can be both uncomfortable and scary for a cat. Do not leave the animal unattended during the rehabilitation period so that the pet does not remove the collar and cause injury to itself. If your cat refuses to eat or drink water while wearing a collar, try to remove the protective device from it for a while and offer treats and liquids. A proper diet for recovery is no less necessary than treatment.
Making a protective product for a pet
You can make a collar for your pet yourself. There are several different ways to make it, depending on the materials chosen.
Express version made from cardboard
If you don’t have time to purchase a collar, but you need it urgently, you can build it in a short time from what you have at hand. You will need:
- thick cardboard;
- tape measure;
- compass;
- stapler;
- scissors;
- scotch.
The procedure is as follows:
- On a sheet of cardboard we draw a semicircle (diameter - 20–25 centimeters).
- Cut out the part and roll it into a funnel.
- Using a measuring tape, we find out the circumference of the pet’s neck.
- At the base of the cone we make a hole, the diameter of which is equal to the circumference of the cat’s neck.
- After you wrap the future collar around the cat’s neck, its side sections will need to be secured with a stapler or tape.
Video: making an “Elizabethan” collar with your own hands from cardboard
Collar made of plastic
To make a plastic collar you will need:
- two-liter plastic bottle or stationery folder;
- Velcro;
- stapler;
- scissors;
- adhesive plaster.
A plastic collar is not the most comfortable option available. But if the animal does not have too long a rehabilitation period, then it is quite suitable, especially since this product can be made more comfortable.
Do not give in to provocation - any animal will try to remove the collar
It is made as follows:
- Cut a two-liter bottle in half (or unfold a plastic folder), draw and cut out a collar in the form of a semicircle (it is also better to limit its diameter to 25 centimeters).
- Fold the semicircle into a cone. At its base, cut a hole with a diameter determined by the thickness of the cat’s neck.
- Attach Velcro fasteners to the side sections of the cone with a stapler. You can also make holes at the edges of the cuts using sharp scissors and connect them with a soft cord or ribbon.
- Cover the top and bottom edges of the collar with adhesive tape. This will soften the edge adjacent to the cat's neck and strengthen the one that will encounter obstacles. It is very important that all edges of the homemade plastic collar are even and smooth.
Video: making your own plastic collar
Fabric collar
Despite its apparent complexity, making a fabric collar will be no more difficult than the first two. This is the most comfortable and soft protective product for a cat.
- paper;
- ruler;
- compass;
- scissors;
- threads;
- needle;
- natural fabric;
- felt or thick non-woven fabric;
- Velcro.
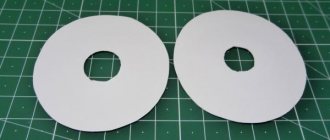
The shape of the collar is again a semicircle with a diameter of 25 centimeters. The collar pattern is first drawn on paper.
Then proceed like this:
- Using the resulting layout, apply the pattern to the fabric (it is better to use cotton or linen) and cut out two identical parts.
- They try the pattern on the cat and cut off the excess. By the way, it is always better to cut a piece of a larger size and reduce it if necessary, than to save fabric and find that the product is too small.
- Using the same pattern, you need to cut out parts from felt or non-woven fabric. You can use several layers of other, less dense fabrics (for example, drape) and stitch with small diamond patterns.
- Now a layer of strong material is sewn inside two pieces of thin fabric. To do this, the three resulting layers are stitched along the entire perimeter, excluding a small section 5 centimeters long. It is necessary so that you can later turn the collar right side out through it.
- Turn the product inside out and iron it.
- The remaining hole is sewn up by machine or by hand.
- Ties or Velcro are sewn onto the side edges to secure the device to the cat’s neck.
Fabric collar - soft and comfortable barrier
How to put on a collar
If you did not have a collar at the time of the operation and you purchased it after visiting the veterinarian, then you will have to overcome the dressing stage yourself.
In order for everything to go smoothly enough, you need to follow several rules.
First, find out what size collar you need, measure your neck and remember: it should not fit very tightly and sit loosely: leave a distance of one finger between it and the neck.
Then check the edges of the collar, they should not be sharp; if you think that the cat might get hurt from it, then it is better to treat the edges with tape or cloth.
After the preparatory stage, you need to prepare the animal: caress it, calm it down, if you notice mistrust and fear, it is better to wrap it in a soft blanket or towel. Because when you put on a collar, your pet may begin to resist and behave aggressively, which can cause damage to you and your pet. If possible, it is better to invite an assistant.
Once the collar is on the neck, secure it and again try to calm your pet.
At the end, be sure to double-check the gap between the neck and collar. If the gap is smaller than a finger, this will lead to chafing of the skin, and a larger gap will allow the pet to easily remove it. The collar should not put pressure on the neck, but should not dangle either.
Please note that sometimes the collar must be removed to give your pet a rest.
You can buy a protective collar for cats at a pet store or make it yourself, with your own hands, from a variety of materials: plastic, cardboard, fabric and other improvised things.
From cardboard (video)
A cardboard collar is not durable.
For manufacturing, it is best to choose thick packaging cardboard. These could be old boxes and crates. Some people choose corrugated cardboard, but it is not as convenient to work with or carry. Such a collar cannot be used for a long time, but if you need a design for just a few hours, then this option is for you. You will need: cardboard, tape or stapler and string.
Step-by-step instructions are well reflected in the video.
Made from lightweight plastic
Another collar for cats for use after surgery can be made of lightweight plastic. For example, it can be constructed from a stationery folder or a flexible, thin cutting board.
Prepare all materials: plastic, A4 sheet, stapler, tape, ruler, scissors, compass and Velcro.
Next, start making the pattern:
- Take neck measurements and the distance from the tip of the nose to the neck in a straight line.
- On sheet A4, draw 2 circles, the small circle is the circumference of the neck, it will be located inside the large circle, we draw it based on the measurements of the distance from the nose to the neck plus 3 centimeters in reserve.
- Indent the small circle by 2 centimeters and draw an additional circle. Remember, this is where the collar or Velcro will be attached.
- First, cut out a large circle, preferably with a margin of 2-3 centimeters, this is necessary so that if suddenly there are inaccuracies in your measurements, after trying on you will understand whether you need to make the collar shorter.
- Next, use a ruler to draw a straight line from the small circle to the edge of the large one.
- Make a cut along this line.
- Cut out the smallest circle.
- From the void of the small circle to the middle one, draw stripes and cut out the excess. You will now have loops for the collar.
You can use this pattern as an example.
Try the finished pattern on the animal; if you see any shortcomings, it’s better to make adjustments. If the dimensions of the pattern suit your pet perfectly, then you can start creating the product from plastic:
- Transfer the pattern to the plastic from which you plan to make the collar.
- The strips need to be secured; if you use a stapler, be sure to wrap them with tape so that when wearing the cone, the pet does not get hurt on the staples.
- The Velcro can be secured with glue or also with a stapler; it is better if the segment is more than 7 centimeters.
Thread a collar or bandage through the loops, place the collar on the animal and secure with Velcro.
Made of plastic (video)
If after our instructions you still have questions, then this video well describes the process of making a plastic collar at home.
Soft fabric collar
Another material from which you can make a veterinary collar yourself is fabric. The product made from it is characterized by increased comfort: it is comfortable to sleep in, it is more comfortable and lightweight.
You will need thick fabric and a pattern similar to that used for the plastic collar.
A fabric collar is the most convenient to use.
Transfer the design to the fabric (don’t forget to add 2 centimeters for seam sealing), you will need two identical cutouts. Sew the fragments together to make the fabric denser; if two fragments are not enough, then insert a soft cardboard pattern between them. To increase the rigidity of the product, you can also sew a edging made of dense material along the outer edge. Make holes in the side edges and use tape or Velcro to connect them.
Despite the simplicity of manufacture, this collar is very convenient to use and does a good job of protecting. Difficulties can arise only if the pet constantly tries to remove the collar; it can deform the cone, and the cat will reach into the places from which you wanted to protect it.
Collar made from scrap materials
If you do not have materials such as fabric, cardboard and plastic or do not have the opportunity to make a pattern, then you can use other things at hand. For example, you can make a collar from a plastic or paper disposable plate. As always, first you need to measure the circumference of your pet’s neck, draw a circle (plus 1 cm) in the middle of the plate, cut it out; handle sharp edges to prevent them from injuring your neck in the future. After putting the product on the animal, glue the cut area with tape. This design is temporary and is not suitable for the postoperative period, but if you need the medicine to be absorbed after treatment, then such a collar will completely cope with the protective task.
You can also make a collar from a plastic bottle. The volume of the bottle depends on the age and size of the pet; if it is a kitten, then a one and a half liter container is suitable, but if it is an adult cat, then it is better to resort to 5-7 liter bottles. There are 2 options for making a bottle collar:
- Cut the bottle; arrange the cut out layer into a cone shape; glue the Velcro fasteners with superglue; cover the sharp edge with electrical tape.
- Cut the bottle into 2 parts; remove the neck (you need to know the size of the neck in advance); cover the sharp edge with electrical tape; attach a collar to the strings that you will attach to your pet’s neck.
A striking example of a bottle collar.
Features of the pattern
- In order to make a collar for animals, a pattern in the form of half a ring is used. It can have different height, length, width. From such a part a cap is made with a cutout for the neck, its edges are securely fastened.
- When creating a pattern, you need to measure the circumference of the neck (this will be the length of the inner semicircle), the length from the neck to the tip of the nose (plus five centimeters). You can make a small reserve according to the parameters, cut out the blank, fold it, try it on and trim off the excess.
If the collar greatly blocks the cat’s view of the environment, the pet will be very nervous , which will have a bad effect on the progress of rehabilitation.
How to properly put protection on your pet?
It is important to understand that the size of the product is critical. For the veterinary protection functions to work and not cause discomfort, the collar must fit well on the animal. If you go to the store to buy a finished product, measure the circumference of the dog’s neck. The seller will select the necessary option with knowledge of the matter.
All veterinary collars are secured around the dog's neck. For this, a collar, cord, bandage, tape of fabric and other convenient materials are used. The device is designed to limit unwanted actions and becomes a barrier between the head and torso.
Most models require preliminary preparation before use: assembly, inflation. Instructions with a detailed description of the assembly and donning procedure are included in the kit for each specific product.
Getting used to wearing a collar correctly
We have sorted out the material of the model and the size, all that remains is to convince the dog that the structure is attached for its own good and there is no need to be afraid of it or try to remove it. It will take a little patience:
- If the animal is awaiting a planned operation, purchase or make a barrier collar yourself a few days before the event. Leave the protective device within the dog's reach. Let him sniff, examine the unfamiliar object, and get used to it. First disassembled, then assemble it.
- When the pet calms down and stops paying attention to the object, carefully, slowly, put it on the dog.
- Distract the animal with play if the disease does not prevent activity. Show that the product does not interfere with him. Talk to him soothingly and kindly. If there are no attempts to get rid of the collar, reward him with your favorite treat.
- For the first fitting, 2-3 minutes is enough. In subsequent times, increase the time by a few minutes. As soon as the dog comes to terms with the foreign body on its neck, teach it to eat and walk in it. If no problems arise, leave the device to sleep.
- It happens that a protective device has to be used after an accidental injury or urgent surgery, when there is no time for psychological preparation. If the collar bothers your pet unnecessarily, remove it for a while and carefully monitor your dog's actions so that he does not harm himself. When the anxiety subsides, put the protection back on. Complete adaptation usually takes place within two days.
This useful and easy-to-make device will protect your pet from unwanted damage when scratching and licking. Follow the recommendations of specialists and carefully study the instructions for the product. The recovery process will be faster and more painless in this case.
Related video: how to make a protective collar for a pet with your own hands
How to choose?
Choosing a postoperative collar that will fit perfectly is quite problematic. After all, it must be comfortable, strong, and also of a suitable size. When you choose a collar for your pet, you need to follow some rules: the collar should be comfortable to use. To prevent it from causing discomfort to the pet, the part adjacent to the neck should be soft. You can cover it with fabric.
- Satisfactory height. The collar should not block the pet’s view, because he may begin to worry and will not get used to the new “equipment.” Also, the collar should not be too low, then it will not interfere with the cat.
- Right size. It is also of great importance. Before purchasing a collar, be sure to measure the diameter of the neck, as well as the distance between the neck and the tip of the nose. Because if the accessory is small, then it will press, but if it is large, it will dangle, and the animal will get out of it without any problems.
- Strength. The collar should be strong, hold its shape well and fasten well. The cat should not remove it on its own. But it also cannot be too tight so that the animal can breathe calmly.
How to do it?
There are times when there is simply no opportunity to buy this device. But you don’t have to worry about this, since it’s easy to do it yourself. You don’t need various tools that only masters have; everyone has everything they need in their home. To create a collar you can use items such as:
- cardboard;
- plastic bottle;
- a flower pot.
When making this accessory, you will also definitely need a comfortable, wide and not very stiff collar to attach the collar to. You can also use a harness. In this case, the load will be placed not only on the neck, but also on the spine, which will greatly facilitate the wearing period. By following the instructions, you can easily make an Elizabethan collar.
Made from lightweight plastic
This option is the simplest. For it, you can take the simplest stationery folder. If you cut it, you will get a fairly long piece. For this design you will need:
- adhesive tape, adhesive tape or double-sided tape;
- stapler with large staples.
Before you start creating, you need to take measurements: the diameter of the neck and the distance from the neck to the tip of the nose. Then we take a sheet and draw two circles on it. The smaller one is the neck. And in order to draw a larger circle, you need to measure the length of the head from the smaller one, but 3 cm higher than it is. Then inside the small circle we draw the next circle, it should be 3-4 cm smaller, the collar will be attached there.
Next, cut out the sample and don’t forget about the reserve. If you are in doubt about the length, then cut it
Fabric collar
In order to sew a device from fabric, you should use a regular pattern; a thick edging is sewn along the edge; it will hold the structure. A soft version of a protective product may not provide complete protection ; you need to observe the behavior of your pet in such a design. If the cat tries to remove the collar or press it with its paws, a more rigid sample will be needed. The health of the pet should be the main factor.
Plastic bottle collar
When purchasing at a veterinary pharmacy or pet store, the question arises how much an “Elizabethan” collar for a cat costs. The price may surprise you, especially for imported products from famous brands. Since the design is most often used temporarily, for a short period, it is more practical to make it from scrap materials, for example, from a plastic bottle . Additionally, you will need Velcro and ribbons.
- The bottle needs to be cut so that it forms a cone.
- To prevent the cat from being injured by sharp plastic, the inner edge should be covered with tape or a strip of fabric.
- Where the parts of the product will be connected, ribbons are sewn for ties.
In this way it is easy to make a product from a transparent plastic bucket or flower pot.
Option for quick production of a veterinary collar
In emergency cases, there is no time to sew a veterinary collar or look for one in pet stores. If you need to put such a device on your head urgently, you can use a temporary option.
- You need to flatten the cardboard and cut a semicircle out of it. Then the material should be twisted, this will make it softer.
- The blank must be tried on the animal, cutting off the excess.
- The edges of the cardboard may be sharp; you need to cover them with tape.
A temporary option is used when urgent protection is needed for the cat’s wounds. You can also use it when treating your pet antibacterially, when applying flea or tick spray . The pet should not touch its fur or skin for a while. Then the simple collar is thrown away without regret. The best material for construction is thick cardboard from a shipping box or shoe box. If the cardboard is very thick, it is better not to use it for cats; it is only suitable for a dog collar.
The simplest option for a cardboard collar may be if it is needed only for a short time (before visiting the veterinarian, before purchasing a more serious design).
ATTENTION! The design of even such a temporary structure can be thoughtful and convenient. If you tape simple loops of paper or fabric to the edge of the collar, the collar can be laced.
Wearing rules
Cats need protective collars to prevent them from licking wounds or touching treated fur. The device will not delight the animal, but you need to be patient and, most importantly, choose the most convenient and reliable option .
The high, rigid collar should be removed periodically, giving the cat the opportunity to take a little break from the structure.
- While the cat is without barrier protection, it is better to hold it in your arms or control it in another way .
- Some pets are particularly stubborn or susceptible to discomfort. They may even refuse to drink or eat because of the veterinary collar.
- Such pets need to remove the collar more often so that they can eat according to the schedule and drink water.
- Felines are considered smart and cunning animals; at first they will try to get rid of a structure that is inconvenient for them. It is important to monitor the process so that postoperative rehabilitation occurs according to the rules.
Indications for a cat to wear a protective cone
An Elizabethan collar is worn on a cat when:
- diseases of the ears and eyes - constant scratching and licking of medications interferes with recovery;
- injuries - to prevent infection;
- infectious and parasitic diseases - to avoid repeated self-infection;
- during abdominal operations, including castration, sutures must be protected from infections and mechanical impact with a rough tongue;
- treating skin and wool with external antiparasitic and antifungal drugs that have a toxic effect.
The procedure is best carried out by two people: one person should hold the animal, and the second should put on its collar. The main thing is to do everything carefully and not to rush, so that the cat’s stitches do not come apart (for example, after castration). To put a protective collar on a cat, you need to:
- assemble the product following the instructions and attach it to the collar or bandage;
- place the pet on a flat surface and secure it with your hands;
- put on a collar with a collar and check whether it is too tight for the cat, then fasten all the elements of the structure;
- calm your pet down - give him his favorite treat, pet him and pick him up.
You need to keep an eye on the animal, as it can get stuck in narrow passages or cling to other objects. To avoid dermatosis, it is necessary to regularly check the skin of your pet’s neck for abrasions - this can happen if you use a rough collar, a heavy structure, or fix it with the same non-sterile bandage every day. Due to the fact that it is difficult for a cat to lick itself because of the collar, it is necessary to comb its fur more often.
A protective collar is a veterinary device in the shape of a horn or funnel that limits the animal's mobility. As a means of protective therapy, the collar will prevent the cat from licking medications from the body, licking a post-operative suture or a damaged area of skin.
The veterinary collar is also called the “Elizabethan” collar. This is due to the fact that it resembles a piece of clothing worn by noble ladies of the era of Queen Elizabeth I of England. In the 16th century, lush, rigid collars made of starched fabric (usually lace) were in fashion. Of course, turning your head in such a dress was extremely difficult. Later, this design served as the basis for the creation of a veterinary collar.
The veterinary device resembles the collar of Elizabeth I's royal dress
Barrier therapy, of which the collar is one component, is used for a number of health problems in pets. Here are the main ones:
- The cat tries to lick the wound (especially if it heals and begins to itch), this prevents the restoration of the damaged area of skin.
- The animal has undergone medical surgery (for example, a spay procedure or tumor removal). In such a situation, it is important to prevent licking and chewing of the sutures placed by the veterinarian.
- The cat has been neutered. In this case, the animal will not have stitches, but the operation site is treated with an antiseptic, which also cannot be licked off. There is also a danger that the cat will begin to lick the sore spot and thereby provoke bleeding.
- Your pet's ears hurt. The animal begins to scratch them, which provokes additional infection, as well as untimely removal of veterinary drugs from the ear cavity.
- The cat was treated with a remedy against ecto- and endoparasites. Animals should not lick such substances, as this can cause poisoning. And you won’t have to wait for the effect of the antiparasitic agent either.
- A cat that is active, fearful or aggressive needs to have its fur or nails trimmed. The collar will protect the owner from pet bites.
The protective collar is shaped like a bullhorn
In all of the above cases (except, perhaps, for ear diseases and treatment for parasites), the owner of the animal is faced with a choice: a special blanket or a veterinary collar.
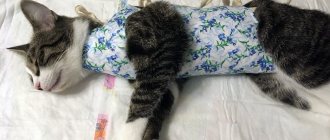
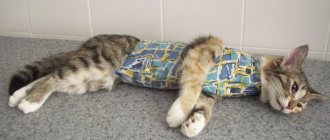
The blanket will protect the postoperative suture from not only germs, dirt and fungi getting there, but also from the cat itself, which after surgery tries to chew or lick the place that bothers it
The advantages of the blanket are that it:
- does not restrict the cat's movements;
- does not cause her anxiety or irritation;
- allows you to wash exposed areas of the body;
- protects stitches or wounds from contact with other objects that are not always safe and sterile.
We invite you to familiarize yourself with Carcinoma in cats: diagnosis, symptoms, prognosis and treatment
But especially active pets manage to take off their blankets. And if they leave them alone, they begin to lick the sore spot through the fabric. Sometimes even this is enough to damage the seam. Blankets also get dirty quickly, especially if the wound needs to be treated with medications.
Advantages of a collar compared to a blanket:
- completely limits the cat’s access to the sore spot, be it the head, paws or torso;
- the animal will not be able to hide in a hard-to-reach or inappropriate place thanks to the voluminous collar on the neck.
The pet will be dissatisfied with the presence of the collar, since it can hardly be called comfortable. The cat will cling to surrounding objects with it and try to remove it. And most importantly, the collar needs to be chosen correctly.
Using a blanket and collar at the same time completely protects the wound or seam from access by the animal
Veterinary pharmacies and pet stores offer a large selection of Elizabethan collars for cats. Their cost depends on the materials and the size of the pet for which the device is purchased (they are not divided into cat and dog). The price of such products ranges from 100 to 1200 rubles.
Instructions for use
It’s not enough to just buy a collar for cats and put it on, you need to remember that the animal is wearing a hindrance, and he will have to help him live with it. To begin with, the collar must be removed at each feeding - the cat simply cannot reach the food in it. You will have to do the same when your pet wants to drink, so you need to constantly monitor her.
If injections are given in the cat's scruff, you need to put on the collar so that its clasp (the roughest part) does not fall on this place.
What you need to pay attention to so that the use of a protective accessory brings maximum benefit and causes minimal inconvenience to your pet.
- Choose a post-operative collar for your cat exactly according to the size of the animal. It should not fall off or be too tight.
- Do not use models that are too heavy or bulky - they excessively restrict the cat’s movements and interfere with visibility.
- Do not opt for the cheapest models - they may be made from toxic materials.
- If the structure has sharp edges, they must be treated with adhesive tape or tape.
- Special “children’s” models are selected for kittens; it is unacceptable to use a collar “for growth.”
- When a cat is wearing a protective cone, it should not be allowed outside - it is not safe.
- When using the collar, you need to organize the cat's eating area so that she can reach bowls of food and water.
- If a cat refuses to eat while wearing a collar, it should be fed by hand or without a collar, but under the supervision of the owner.
- The structure is not removed until the wound has completely healed or until the veterinarian gives permission.
- During use, it is necessary to check the skin under the collar to prevent chafing.
- The collar prevents the cat from grooming itself - do not forget to brush the animal daily.
- The collar makes it difficult for the animal to move; prepare the living space in advance. Make sure your cat doesn't accidentally get stuck in narrow passages.
We invite you to read: How long does pregnancy last in British cats, stages and timing
What is an Elizabethan collar?
Already in the time of Elizabeth, the clever cat owner had a great idea. The idea was to limit pets' ability to scratch and lick themselves. This structure was called the Elizabethan collar. However, later it began to be called simply E-collar.
When does a cat need such protection?
Such a device may be needed when not the most pleasant events happen to your cat, these could be:
- wound;
- surgical sutures;
- scratched wounds;
- castration;
- other skin damage.
For example, you need to apply ointment and a bandage to the damaged area, and to prevent the cat from licking it off, we put on a so-called Elizabethan collar. It ensures your pet a complete and safe recovery. You can buy it at any pet store or make it yourself.
What to do if the animal cannot get used to the collar
A cat owner may notice that his pet is taking off his protective collar, what should he do in this case? Most likely, an unreliable design was chosen that can be easily removed over the head or unfastened or torn.
Perhaps the product has sharp edges that rub the animal’s neck and cause irritation . This assumption should be tested.
IMPORTANT! Cats have a great sense of how people treat them. If, in addition to the inconvenient design, they also receive indifference from the owners, rehabilitation after injury or surgery will be difficult.
There are cats that will not be able to put up with a collar for a long time; you need to show maximum attention to your pet, pick it up more often, and calm it down. When it’s time for lunch, the “Spanish cow collar,” as it is sometimes called, needs to be removed and the cat should be fed something tasty.
Your cat may be irritated by certain types of collars, such as those made of plastic or opaque. If you change the design, the cat calms down and over time gets used to slight discomfort.
What to look for when choosing
When buying a protective collar, focus on its size, length, and the material from which it is made.
Manufacturers, as a rule, produce collars made of plastic. This is the most inexpensive model. A reinforced collar can cost a little more - it is trimmed along the edge with an elastic band that protects the structure from breakage. A plastic collar in the shape of a semicircle is wrapped around the cat’s neck and fastened with “tabs” that are pushed through the holes on the opposite edge. Its advantage is that, thanks to the transparency of the plastic, the cat retains its usual view.
If you purchased a plastic collar without elastic around the outer edge, you can reinforce it yourself. To do this, cover the edges of the collar with a regular adhesive plaster. This will protect the upper part from the consequences of collisions with external objects and make the lower part (adjacent to the cat’s neck) softer.
If you want your sick pet to feel more comfortable, and you plan to wear the “protection” for a long time, then you can look for a collar made of soft fabric or non-woven water-repellent material. The shape of such products is a cone or a lifebuoy. The latter option is reminiscent of the pillows that passengers use for comfortable sleep on long journeys. This model is made from padding polyester, cotton or polyester and water-repellent impregnation.
It is not difficult to put such a collar on an animal, because it is attached with Velcro fasteners to a regular collar or has convenient fasteners. This collar does not have to be unfastened every time to feed your pet, because you can eat food, drink water and move actively in it. It can also be washed if it gets dirty with medicine or food.
A collar made of non-woven water-repellent materials in the shape of a cone causes less discomfort than a plastic product. The most comfortable collar for a cat is like a lifebuoy. A plastic collar can be inexpensively purchased or made with your own hands.
The size of the collar should correspond to the circumference of the cat's neck with an allowance for freedom of fit (you can stick a finger between the neck and the collar). A narrow collar will cause additional discomfort to a sick animal, while a collar that is too wide may slip off the neck.
The width of the protective field (length of the product) must be sufficient to protect the cat from harming itself. It is approximately equal to the height of the cat's head with a slight increase. If these parameters do not meet, the collar will either not perform its protective function or will interfere with the animal’s movement around the house.
Factory collars have a unique division into sizes, in which the numbers correspond to the scale of the protective field:
- No. 7 (7.5 cm);
- No. 10 (10.5 cm);
- No. 12 (12 cm);
- No. 15 (15 cm);
- No. 20 (21.5 cm);
- No. 25 (25 cm).
Thus, for small kittens, size No. 7 is often chosen, and for adult kittens, sizes No. 10 and 12 are often chosen.
History of the name, design and purpose of the Elizabethan collar
A device for protecting the skin from licking by a cat has many names: veterinary, medical, Elizabethan collar. The last name is most often used, because this design is similar to a lush accessory, which was especially popular during the reign of Queen Elizabeth I of England. The device is a cone-shaped structure made of dense material, the base of which corresponds to the circumference of the cat’s neck.
This device is designed to prevent the cat from licking healing wounds, stitches, etc., as well as to prevent the licking of veterinary medications in the form of ointments and sprays. A correctly selected and put on cone does not restrict the cat’s movements, does not cause him discomfort, and does not interfere with eating and drinking. Of course, the animal tries to remove it in the first days, but then gets used to it and does not notice it until the end of treatment.
