Types of animal houses
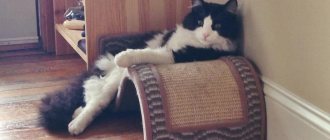
House for a cat made of boards
There are many ideas for making cat houses. It all depends on the amount of free space in the room and your taste.
You can build:
- cardboard house
- soft foam construction covered with fabric
- cat housing made of plywood, fiberboard, chipboard or hardboard
- a product made from old furniture boards, boards and wooden blocks
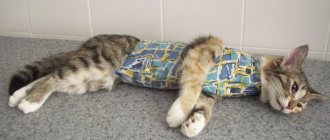
Housing for two cats
You will also need to choose the shape of the home.
A cat's house may look like:
- a simple house in the form of a booth with several windows
- house with an attached shelf-ladder, scratching post and hanging toys
- multi-storey gaming complex
- a house with a climbing tree attached to it
- a product built into furniture with a separate opening
- wall-mounted dwelling
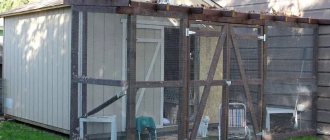
- street house
- home for two cats at once
- maternity hospital for an animal awaiting replenishment
- a bed with a wire frame covered with an old T-shirt
- sofa
- bed
- hammock, etc.
When making a home for your pet, do not forget about the overall interior of the room. If you choose the right fabric for decoration and the shape of the house, it will become a true decoration of the room and fit perfectly into the interior.
How to make a cat house quickly and inexpensively
I would like everyone’s favorite to have a house, but sometimes I don’t have enough time or money. You can make a cat's home from scrap materials without spending a lot of time. Here is one idea for such a light house.
For a “quick” house we will need:
- Cardboard or wooden box
- Old T-shirt
- Stapler
Making a house
- Prepare the box: glue the cardboard in the torn places, clean the wooden box from unnecessary parts, such as nails, staples and other objects that can harm the animal.
- The box should only be open on one side. Place a T-shirt over the box so that the neckline is in the middle of the open side of the box. This will be a kind of entrance to the house.
- Carefully fold the excess material from the hem of the T-shirt to the bottom of the box and secure everything with a stapler so that the material does not dangle. Tuck the sleeves inside.
- You can first put a soft mattress for the animal or a rug inside the box.
There you have it, an easy version of a cat house!
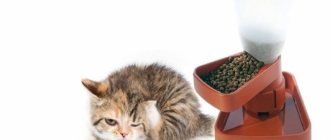
You can always pay attention to your beloved pet and give the cat his own house, even if you don’t have enough time. Cats love to climb into various containers and cabinets. So why not give them their own place where they can hide and play? This will bring the animal a lot of joy and pleasure.
Required materials
Plywood house
An original house can even be made from improvised means or materials left over after renovating an apartment.
If you allocate some money for the “construction” of the house and purchase several wooden slats or plywood, as well as soft and durable fabric for covering, you will be able to make an original design structure that you will not be ashamed to show to guests.
So, you may need:
- cardboard : if you think that the structure made from it will be too flimsy, then you are deeply mistaken; to obtain a durable structure, it is enough to glue it in several layers
- plywood, fibreboard, chipboard or hardboard : with the help of these durable materials you can even build a multi-storey house or palace house
- wooden slats : they can be used as spacers when creating a structure covered with fabric or upholstered in plywood
- PVC pipes and fittings for connecting them : they can easily replace wooden slats, and the structure from them will be no less durable
- carpet, felt or foam rubber : they can be useful not only for arranging a bed, but also for covering the side walls
- durable fabric or fur for making a bed
- any kind of cat toys for hanging
- wooden block for scratching post
- hemp or jute twine for covering it
Do not use highly electrified fabrics for upholstery. They will scare the animal.
Requirements for a cat house
When choosing a design, it is recommended to take into account the needs of the animal, which may depend on the breed, age and character. Therefore, the cat house must meet the following requirements. The design should be:
- safe;
- fenced;
- durable, reliable, the house should not fall when the cat jumps;
- capable of supporting the weight of an animal (if you have a kitten, you need to study the maximum weight of an adult representative of this breed) or several pets at once;
- as closed as possible;
- suitable in size (if there are several cats, then the house should be such that several loungers fit in it);
- easily accessible for the animal, while it is worth taking into account individual characteristics, some of them like heights, while others feel more comfortable closer to the floor;
- cleanable, the material should not easily absorb odors, because they can scare away the cat.
A cat should feel comfortable in its house
Scratching posts, hanging toys, and hammocks would be useful for a cat's house. This will save space in the room. It is advisable to provide as many different holes and lying surfaces as possible to give your pet a choice.
Cardboard house
Of course, you don’t have to worry too much about it and you can make a house out of a cardboard box, cutting out holes in it for doors and windows and throwing bedding at the bottom. By gluing several boxes together, you can get a home with several rooms and even a multi-story house.
But such a structure will quickly become unusable - after all, it can be quickly torn and even “eaten” during the game.
Simple house made of cardboard
Still, it is better to make a more durable structure with walls made of sheets of cardboard glued together in several layers. Moreover, with high-quality finishing, it will look no worse than a store-bought product.
Craftsmen from Japan were the first to come up with the idea of making homes for cats in the form of beehives from corrugated cardboard. Today such structures are available for sale. But we will do them ourselves, listening to the wishes of our pet.
First, let's decide what shape and size the cat's home will be. If a domestic cat is still young and full of energy, it would be more logical to create a multi-story structure for them with shelves for climbing or attach a real tree with many strong branches next to the house.
For a lazy cat who loves to doze almost around the clock, a soft and comfortable one-story structure with a scratching post attached to it is more suitable. The principle of assembling the house will be the same in any case.
House in the form of a yurt
We will describe how to make a simple house for our pet’s cat in the form of a round yurt or a rectangle made of corrugated cardboard glued together in layers.
1Cut the cardboard into rings or strips and connect them in a stack with PVA glue.
2To ensure the stability of the structure, cut out the bottom from plywood, fiberboard or chipboard and glue it to the finished house.
3Using corrugated cardboard you can make not only a house, but also a couch, sofa or bed for your cat to rest. Some cat owners even manage to construct scratching posts from corrugated cardboard. But their lifespan is short. Plus, debris will always form around it - even thick paper will tear too quickly under the pressure of a cat's claws.
4An animal will definitely like a dwelling made of multilayer cardboard. After all, a solid base will be quite warm, and the walls will be ideally protected from drafts.
If you decide to paint your pet's home, use permanent dyes for these purposes. After all, gouache or watercolor are unsafe - after licking the toxic composition from the animal’s fur, it can become seriously ill.
Materials and tools for making the structure
The elements of the future construction depend on the model of the chosen house and the design idea, but there are common components that will be useful in the construction of cat apartments in any case.
These include:
- Cardboard or cardboard box(s)
- Scissors and stationery knife
- Tape measure/centimeter and pencil/pen
- Brushes and glue. Particular attention should be paid to the choice of glue. With its strong, pungent smell, the cat will not want to be inside or even near the cardboard house. To prevent this, the glue must be environmentally friendly and have quality certificates. If it is not possible to find or purchase such glue, PVA glue is perfect.
Armed with the necessary materials, you can proceed to the next stage of production.
Multi-story plywood structure
If you can keep your pet occupied by arranging for him a play complex with ladder shelves, labyrinths, several hanging toys and a scratching post, perhaps he will leave your things alone and will not take them to the corners even in your absence.
Multi-storey plywood house
To make it, in addition to plywood, you will need furniture corners, sandpaper for cleaning cut areas, glue, screws and furniture corners. It is better to first upholster the house with foam rubber, and then with a dense, not too easily soiled fabric.
A piece of carpet will also come in handy - this material is quite durable and will last longer.
Production of a gaming complex in stages
Manufacturing diagram with dimensions
A durable house will be made from plywood, fiberboard, chipboard. You can donate several boards for it - the structure will only benefit from this.
So, step-by-step instructions for making it:
1First, draw a detailed diagram indicating the size of each part. Even if it is quite simple, you should not ignore this stage. It will be a shame if, when joining individual parts, they do not fit in size.
2Plywood, if desired, can be bent and products of complex shapes can be made from it. To do this, frequent blind cuts are made in it. A similar method is used when bending chipboard and MDF. In the future, to strengthen the structure, the resulting grooves can be filled with glue. Curvilinear parts from this material are cut out with a jigsaw.
3You can replace wooden blocks with PVC water pipes. To connect them, fittings are used (corners, tees, etc.), which are attached with glue. The pipes must first be degreased with solvent or alcohol, joined to the fittings and marked with a pencil where the glue will be applied. Fixing the elements motionless is required for 5-6 minutes.
4To “build” a plywood house with 4 walls, a floor and a roof in which a cat will rest, you will need 6 square or rectangular parts. Such a dwelling is located at the very top of the structure so that the cat can have a greater viewing angle. And the temperature closer to the ceiling is always higher, and there are much fewer drafts.
5Cats don’t really like closed boxes, so provide not one, but a couple of openings in the house. Be sure to sand the cut areas so that the animal does not get hurt.
6The remaining details of the gaming complex are selected at your discretion, depending on the inclinations of the animal. To fasten pipes or bars in rectangular or round wooden pieces, you will need to drill holes of a suitable diameter.
7 Cover not only the sides of the structure with carpet or foam rubber, but also the inside surface of the house so that the animal feels comfortable in it.
8To make the structure strong, use metal corners to connect the parts.
9Apply a layer of glue to the wooden blocks or PVC pipes and wrap them tightly with hemp or jute twine, tapping it well against the surface of the block with a hammer. It will be more convenient for the cat to climb them to any floor.
10 You can attach a miniature springboard to the house, along which the cat will climb up. Don’t forget to build an observation deck - animals love to climb up to be able to have a good view of the room.
11Make sure the house is securely fastened to the wall or floor. If it collapses one day, the animal will be wary of it and is unlikely to agree to live in it.
The smell of freshly cut boards or glue-soaked plywood can repel a cat. They must be well aired before assembly.
Attaching a tree to the house
The cat really likes to climb tree branches. Do not deny her this pleasure; build a device for her from any available means - PVC pipes or wooden blocks covered with jute rope or covered with carpet.
You can even bring part of a real tree with large knots from the forest.
Tree for a cat in an apartment
1To prevent the animal from dragging the bark all over the house, it must first be cleaned.
2 Carefully sand each of the branches so that the animal cannot get hurt.
3For ease of climbing, attach several viewing platforms to large branches, on which the cat can comfortably lie down and watch those around him. They can be attached using bolts.
4You can hang a hammock on one of the branches. Stretch its ends well so that the animal can climb into it comfortably.
You should not use leather or leatherette for upholstering a lounger - cats do not like slippery surfaces that absorb heat.
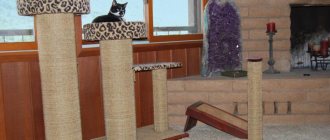
Making a scratching post
Scolding a cat for sharpening its claws is pointless . Indeed, in the wild, when animals climb rocks and trees, they wear off automatically. In an apartment they don’t have this opportunity, and their overgrown claws get in the way.
You can protect furniture and door frames from damage by attaching a wall-mounted, floor-mounted or hanging scratching post to your house.
House with scratching post
Let's describe how to make a house with a scratching post:
1The most convenient design is a column or rectangle with a height of 9-10 cm. Its width should also be sufficient - from 8-10 cm. At the top of such a structure you can arrange a comfortable lounger.
2The scratching post is attached using furniture corners to a cross-shaped, rectangular stand, which, in turn, is screwed to the floor.
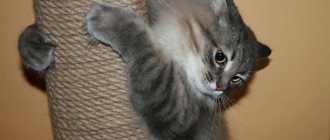
3To cover it, you can take thick jute twine 0.5-1 cm thick, carpet or thick burlap. Synthetic rope should not be used - if an animal gets caught on its fibers, it can damage its claw. The twine is tightly glued to the surface, while being tapped with a hammer.
4As a scratching post, you can use a rug attached to the wall, a carefully sanded log, or even a piece of wood brought from the forest. Before installation, all small knots must be removed and sanded well.
5Hang a couple of your favorite toys next to it - they will help attract the animal's attention.
What you need to make a plywood cat house
The selection of materials and tools depends on the chosen design, the decor of the house, the character and even the gender of the pet. You'll have to take a closer look at the preferences of your pets. Some of them like to hide in secluded corners on the floor, under radiators, and furniture. For such cats, a small, squat house is suitable. Other pets prefer window sills, shelves, and the top of furniture. They will prefer a multi-tiered design.
Whiskered “mothers”, as a rule, prefer floor houses, and “single” cats love high tiers
It is worth considering the gender of the animal. Cats usually prefer a house with an emergency exit, and it is advisable that the opening is not too wide. This gives a feeling of protection. Cats have slightly different tastes. They like to control the situation from above, so they rarely enter the house. For a cat, a design with platforms, the dimensions of which will allow the animal to fully stretch out, is more suitable. It is not necessary to install fencing on the sites. Usually cats do just fine without it.
It is not necessary to arrange a huge entertainment complex for your cat. As a rule, she settles in a couple of her favorite places, and everything else is idle. But the problem is that cats are very capricious: what the owner thinks is comfortable and beautiful may not please the pet at all. It is almost impossible to determine in advance which of the proposed sites the cat will use.
Sometimes you have to create entire palaces out of plywood in the hope that your wayward furry friend will be able to find a suitable place for himself.
Most often, leftover plywood, boards, rope, and fabric are used for the house. In order for the cat to accurately recognize the structure as its home, two rules must be followed:
- All materials should not have a strong chemical odor. What smells very strong even to a human is not suitable for a cat. Natural aromas of wood, wool, and natural fabric do not frighten cats.
- The accumulation of static electricity is unacceptable. That is, all fabrics that can become electrified are not suitable for a cat's house. Animals also don't take plastic very well.
What you will need to create a cat house:
- plywood, chipboard, wooden planks;
- plastic or cardboard tubes for stands and scratching posts (you can use the trunk of a thin tree);
- fabric with short dense pile for upholstery such as carpet;
- rope for scratching post (jute, linen, hemp, sesal).
The frame is most often created from plywood or wood boards. The same plywood or wood goes to the site. Cats love natural wood, so there is no need to cover it with fabric. And the plywood parts will have to be upholstered with soft material to make the animal feel more comfortable.
Advice! To make it easier for your pet to get used to its new home, it is advisable to keep all materials indoors for some time. The cat will have time to get acquainted with them carefully, and the preparations will be saturated with the familiar smell.
Housing built into furniture
You can set up a bedroom for a cat in one of the compartments of a bedside table, closet or chest of drawers. After all, even the most sociable animal needs a place for periodic solitude in which it will feel safe.
After all, even if a pet loves to lie on the sofa, when it sees a stranger, it will most likely look for a secluded place.
To create a house in your nightstand, just make a small hole in it.
It’s definitely not worth allocating space for a house in the hallway. It is better to arrange it in one of the distant rooms, preferably in the one in which the cat is most often. If you are a breeder and your animal is not sterilized, you can also set up a maternity hospital for your cat using ordinary furniture.
To do this, you just need to make a hole in the side wall of the bedside table or closet and build a soft bed from a small children's mattress or an old blanket. If your cat likes to take a nap on an elevated surface, set up a spot for her on one of the bookshelves.
To make it convenient for her to climb up there, place a small ladder nearby, covered with hemp or jute twine.
Even an old chest of drawers can be turned into a cat play set. To do this, you just need to remove the drawers, cover the free space with soft fabric and hang curtains so that the cat can rest quietly in privacy.
A home for two cats should consist of a couple of rooms or have two floors so that each of the pets has their own place.
How to make a plywood cat house
In addition to the house and platform, owners often provide cats with scratching posts, climbing frames, and hammocks. Clothes brushes made of artificial material, mounted at about the height of the cat, should appeal to any cat. A scratching post is a vertically located pipe entwined with a rope made of natural fibers. A climbing frame is a board located at any angle, covered with a porous material, convenient for moving a cat to the upper floors.
A hammock is the easiest to make. This is a rectangular piece of durable fabric reinforced with two cross bars or a rigid frame. A very simple option - ropes or braid are tied/sewn to the corners of the material, which is used to secure the hammock on the site or stretch it between the protruding parts of the house.
In addition to the hammock, a soft fabric tube is sometimes installed, and rigid wire rings are inserted into the edges so that the cat can freely climb inside. For a cat, the color of the upholstery material does not matter, the animal is guided by the smell, so you can choose fabrics that match the overall interior or practical non-staining ones colors
Important! Upholstery for a house with long and shaggy pile looks very impressive, but quickly loses its shape and rolls up. It collects a large amount of wool, dust, and debris, which can cause allergies in the cat or the owners.
House on the wall
Most apartment owners can hardly boast of a lot of free space. It’s not always possible to place even the necessary furniture, let alone play complexes for cats.
But it turns out there is a way out. A house for her, or at least a sun lounger, can simply be screwed to the wall. Such a home is also convenient if there are children aged 2-5 years or dogs in the house.
Loungers can be placed directly on the walls
The principle of assembling the structure is similar to that described above. It can be built from plywood, fiberboard sheets, chipboard or wooden boards. But you shouldn’t use boards from old polished furniture for assembly - the animal is unlikely to like moving from shelf to shelf on a slippery surface.
We choose arbitrary dimensions of the house arranged on the wall. To prevent the animal from damaging the wallpaper or paint, you can first attach a wooden board to the wall, and only then hang the shelves.
The scratching post, just like the other elements of the structure, can also be attached to the wall. Combine a similar play complex with a bedroom by attaching a lounger or small hammock to one of the shelves.
What is the difference between houses for cats and cats?
The cat is very comfortable on the roof of the cat house, which has only one entrance. After all, all that a domestic predator may need is a place where from time to time he can retire from prying eyes, and most importantly, an overview to monitor everything that is happening in the area.
In turn, cats love it when there is an additional entrance , and it is more convenient for them to look at everything around them not from the roof, but from an additional stand in front of the home. This feature is primarily due to the fact that the cat views its house not only as a place for privacy, but also as a shelter for future offspring. Therefore, for safety reasons, an additional exit is needed to make the cat feel comfortable and protected.
Tent made from an old T-shirt
The sizes can be arbitrary. The most important thing is that the animal does not feel too cramped in it. A similar structure with a wire frame can be easily moved and placed in another place.
Cozy T-shirt tent
1Make the bottom of the tent from a piece of thick cardboard or plywood. To prevent the cardboard base from bending, glue or tape 2-3 sheets together.
2To make the frame you will need two pieces of thick wire. They will need to be bent into arcs.
3We connect them together so that the ends are located in the same plane. Secure the upper part of the frame, in the area of the crosshairs, with tape.
4To attach the frame to the bottom of the house, we make four holes in the corners of the cardboard or plywood blank. It is necessary to retreat 3.5 cm from the edges.
5After pushing the wire into the holes, its ends must be bent on the back side of the bottom and secured with tape.
6The entrance hole of the house will be the neck of the T-shirt. We turn up the lower part and sleeves. You can simply sew it on by hand, but since the T-shirt will need to be washed periodically, it is better to secure the bottom with pins under the bottom of the house.
7A soft tent for a pet can also be sewn from felt, knitted or other types of fabric. Make a pattern from newspaper, attaching it to a wire frame. When cutting, be sure to leave seam allowances.
Wooden cat house: instructions
You will need:
- plywood,
- furniture corners,
- foam rubber (optional),
- liquid glue,
- sandpaper,
- carpet or any other dense material.
Cut out 6 identical squares of the required size from plywood (according to the size of the base and the required height). In two blanks you need to cut holes through which the animal will enter the house.
Carefully connect 5 squares to create a house without a roof. Fasten all the parts with furniture corners. Now the house needs to be upholstered inside. If you want to create a cozier and more comfortable home, then place a layer of foam rubber under the upholstery. You can attach the materials with glue or a special furniture stapler (in this case, carefully watch the staples - they should not stick out). Sand the entry holes with sandpaper to prevent possible injury.
If you wish, you can complement the design with a scratching post or viewing platform, placing them on the house itself or next to it.
Soft bed
For sleeping, cats most often choose soft pillows, the backs of sofas and other places that are comfortable from their point of view. But it is in these places that the largest amount of wool is always collected. You can solve the problem with the help of a small soft bed.
It is better to use natural fabric that will not electrify - linen, cotton, wool. The filler can be batting or padding polyester.
You can easily make such a bed in one evening
You will need to cut out a pillow-lounger, sides (we will later fill them with soft filling) and handles for carrying. Make a small depression in one of the sides - it will be more convenient for the cat to enter and exit through it.
To give our design its shape, attach a sheet of cardboard to the bottom.
A hanging bed can be attached to a radiator - after all, cats are constantly trying to find a warmer place. To make the frame of such a product you will need very strong wire.
The cover is sewn from two pieces of fabric. Wrap the hanging parts of the frame with fabric or twine. If the fabric bottom of the bed sag a little, it’s okay - if the shape of its bed resembles a hammock, the animal will only be happy about it.
You can even create a cozy place for your pet from an old stool by upholstering its sides first with chipboard or plywood, and then with thick fabric or carpet. Prepare a shelf in it that will serve as a sleeping place.
The author of this video assembled a whole play complex from furniture scraps for a tailed member of his family. You can see all the stages of creating a cat house with your own hands in the video:
Instructions for making a house for two cats
The family has two cats. The older cat is the aggressor and the younger one is more active. Therefore, the design was designed so that the youngest could hide on the highest platform, but the elder, due to his weight, could not get there. They decided to place the house high, since both cats prefer heights. They made it larger in size so that both individuals could be there at the same time.
Source material and results of labor
For this design, thick furniture plywood (12 mm) measuring 75*50 cm, timber posts 50*70 (4.2 m), jute-based carpet - 1*2.5 meters, 20 meters of rope were purchased. Fasteners - corners. For the house - 15 * 20 mm, for attaching platforms - 40 * 45 mm, 55 * 20 and 35 * 40 - for insurance, and a couple of large ones - for attaching to the wall.
We prepare the platforms and attach them to the poles
There are three pillars in the chosen design: one is 220 cm, the second is 120 cm and the third is 80 cm. They will be attached to a base made of plywood sheet. The pillars should be placed on the base so that the longest one is closest to the wall. To avoid confusion, when marking on a sheet of paper, using a ruler and pencil, we first drew a stencil on paper, on which the location of the pillars relative to each other was marked. The markings for installing the pillars were transferred from the finished layout. They were fastened with long nails through the base (4 pieces each), drilling holes of slightly smaller diameter in the plywood. Then they were secured on the outside with corners 55*20 for the large post and 35*40 for the smaller ones.
Markup is the most important thing
Using the same template, the location of the pillars was marked on the platforms, then holes were cut out for them according to the markings. To do this, we took a 12 mm feather drill and drilled holes in the corners marked for installing squares into which the jigsaw blade fits perfectly. From experience: it is better to make the slots for the posts a millimeter or two larger. The platforms are still held in place by the corners, and if the slot is made too small, it will take a long time to refine it with a file or sandpaper.
We fasten the prepared platforms
Before installing the platform, we “try it on”, adjusting the slots if necessary. Having placed the platform horizontally (using a building level) at the required level, mark with a pencil where the platform stands. Using this marking, we then install the corners, so that we make clear marks on all four sides. When all the platforms are installed normally, we cover them with carpet.
Assembling the house body
Two pieces of plywood 75*50 cm were cut into 4 rectangles. They made the roof, floor and two side walls. When making one of the shelves, there was a piece of plywood left with a semicircular hole in the side. It was decided to make it an “entrance”, and the back wall was cut out from one of the pieces. All that remains is to assemble the house, which is not difficult at all. Small metal corners were used, which were fastened with short self-tapping screws.
Preparing a “nest” for a cat
Before covering the house with a roof, it was upholstered from the inside, thus covering the fasteners and increasing comfort. Working inside the case is not so convenient, but you can manage. The roof was covered on both sides, after which it was secured using the same corners, but placed on the outside. Not very pretty, but not deadly. The finished house was secured in its designated place. The corners came to the rescue again, but larger ones - 35*40 mm.
We wrap the pillars
The last stage is to wrap the poles, making a scratching post. The easiest way to secure a rope to a pole is with staples. A few staples and you're done. Next, tightly pressing one turn to the other, we wrap the pillars in a spiral. We reach the obstacle, secure the rope with brackets again and continue on the next section.
As it turns out, the rope needs to be hammered...
From experience, I must say that no matter how hard we tried, the turns of the rope did not fit one to the other very tightly; over time, they “got soft” and began to “move” up/down a little. After working through the mistakes, we found a way: after laying several turns, we knock them out with a hammer. Everything is simple, but if I had known in advance... That's all, we made a house for the cat with our own hands. It took about 6 hours.
A similar design is discussed in the video below.